
How to install VQMOD on OpenCart
In Opencart, vQmod stands for Virtual Quick Mod. It is an override system that is designed to avoid any changes in core files. Instead of doing any changes in the core files directly, the changes are created as xml search/replace script files. There is big advantage of using Vqmod is to keep the core functionalities of OpenCart untouched. Here we explain you that how to install VQMOD on opencart.
Installing vQmod
If you want to upgrade your store, it will be more beneficial to use the vQmod system. To install VQmod, follow the below steps:
Step1:
Download the latest version of OpenCart from here.
Step2:
After downloading the appropriate vQmod zip file provided in the link, need to uncompress the zip file.
Step3:
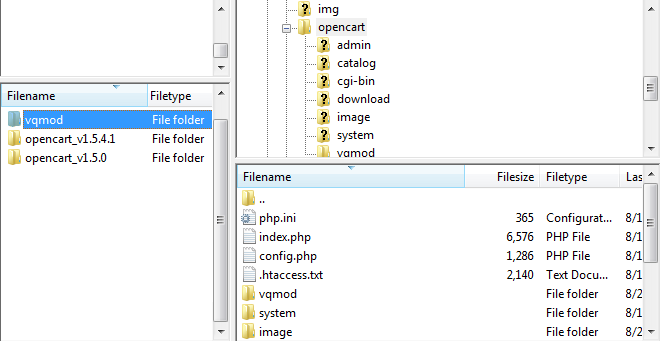
Upload the vQmod folder to your site’s root directory that will make the vqmod folder visible in public_html/opencart.
Step4:
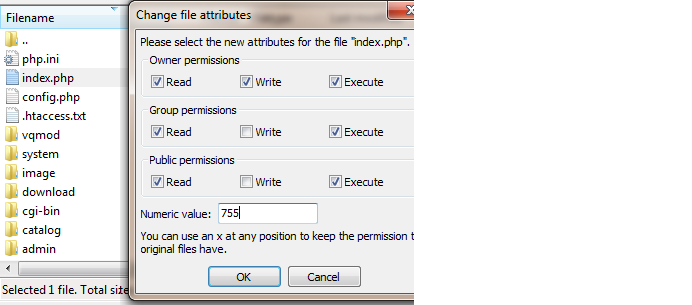
Now, you need to set the permissions to writable for the vqmod/vqcache folders, index.php, and admin/index.php.
Step5:
In Filezilla, right click on a file or folder, select “File Permissions…”, and enter 755 or 777 in the “Numeric value” in order to set it to writable.
Step6:
Visit the install page in your store and then enter your store’s location in browser, and then “vqmod/install” afterwards. For example, if your store is located at “www.myshop.com”, then the location of vQmod install page would be at “www.myshop.com/vqmod/install”. If VQmod has been installed correctly, then this message will appear on your screen “VQMOD HAS BEEN INSTALLED ON YOUR SYSTEM!”.