How to Add Products in Prestashop
In this blog, you will learn how to add products to your PrestaShop. In prestashop, we can add products through admin panel by following steps:
Step 1:
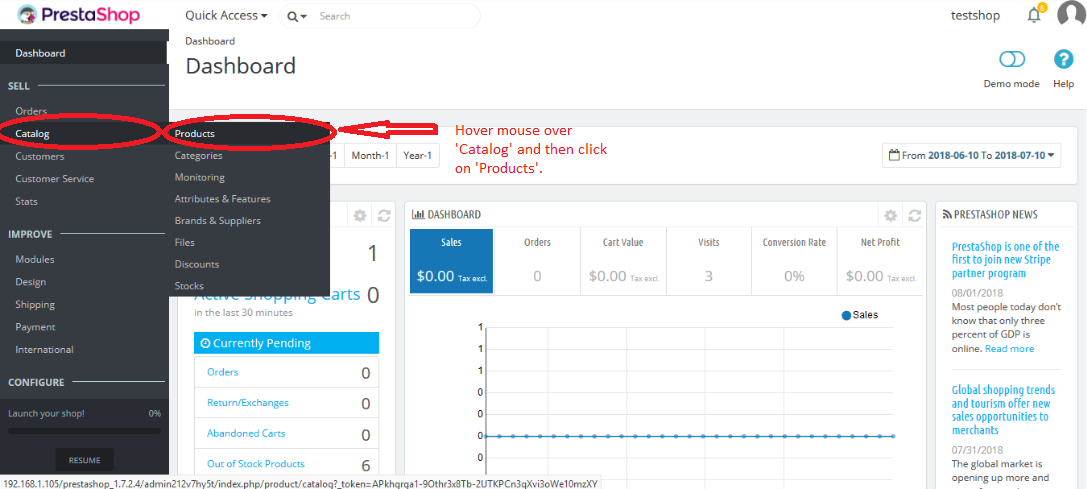
Login into admin panel, after that go to Dashboard->Catalog->Products as given below in screenshot.
Step2:
Now, click on ‘New Product’ button to add new product as given below in screenshot.

Step3:
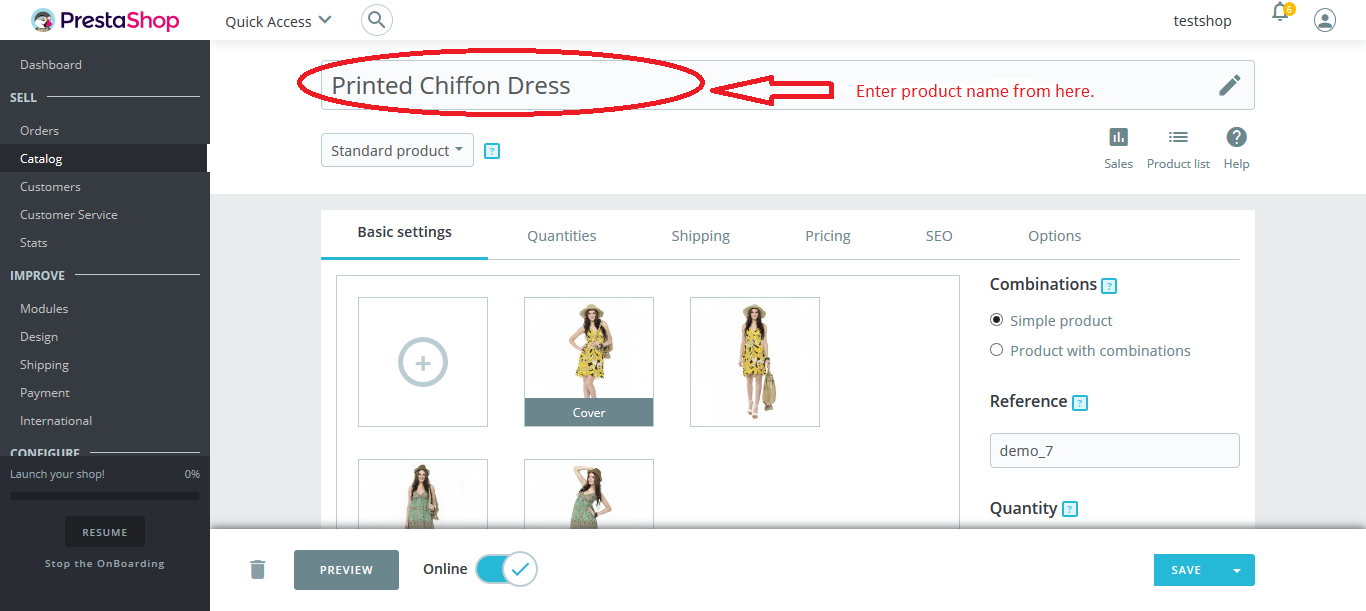
After clicking on ‘New Product’ button, a new page will appear that will ask to enter your product name and consists of Basic settings, Quantities, Shipping, Pricing, SEO and Options tab. So, first you need to enter your product name and then fill all the details as present in these tabs in order to create new product.
Let us start with the first tab i.e; Basic Settings as mentioned in screenshot.
Basic Settings:
For Basic settings,
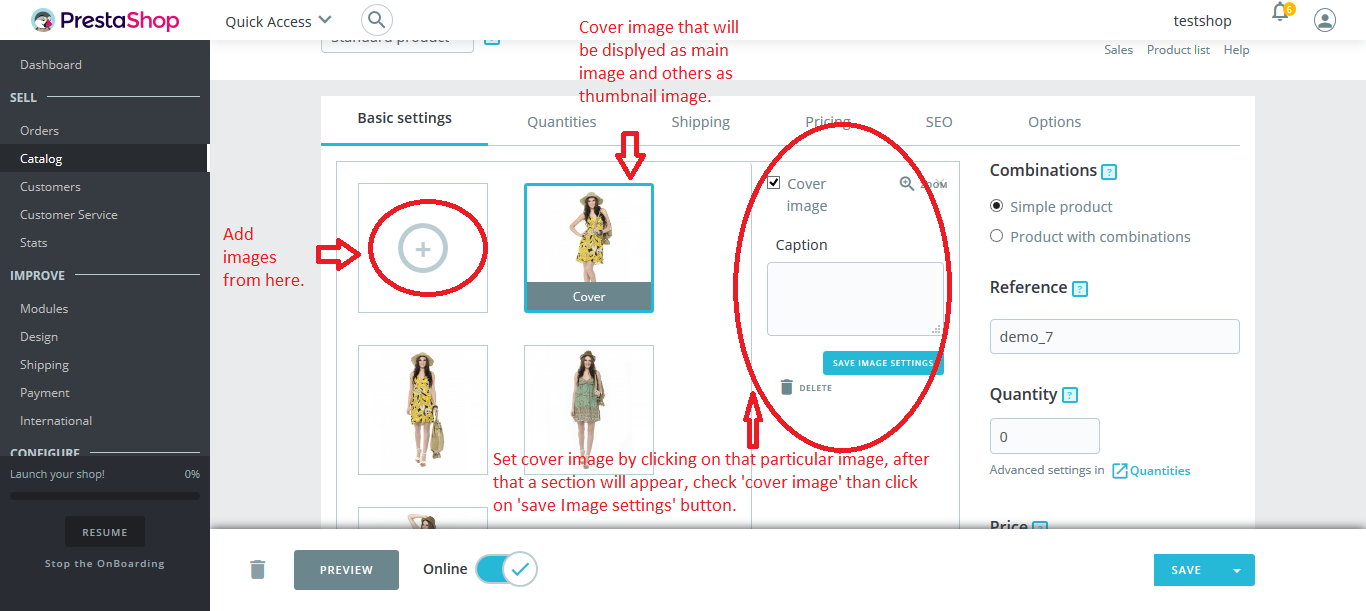
Drop images here or Select files: Browse or drop the product images by clicking on ‘Drop images here or Select files’. Now, choose ‘cover image’ from these browsed images as mentioned in screenshot.
Combinations: Now, choose ‘Combinations’ from radio button. If your products have combinations like different variations of attributes like Size, weight, color have different values, then choose ‘Product with combinations’ otherwise, ‘Simple Product’ as mentioned below in screenshot.
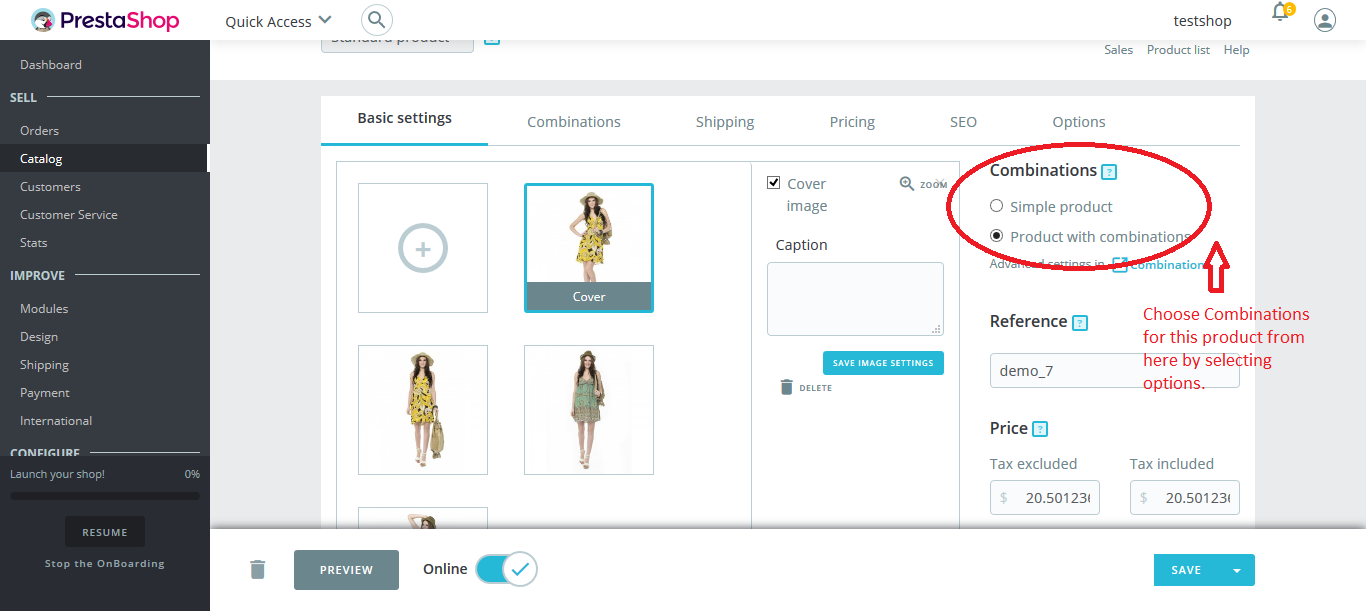
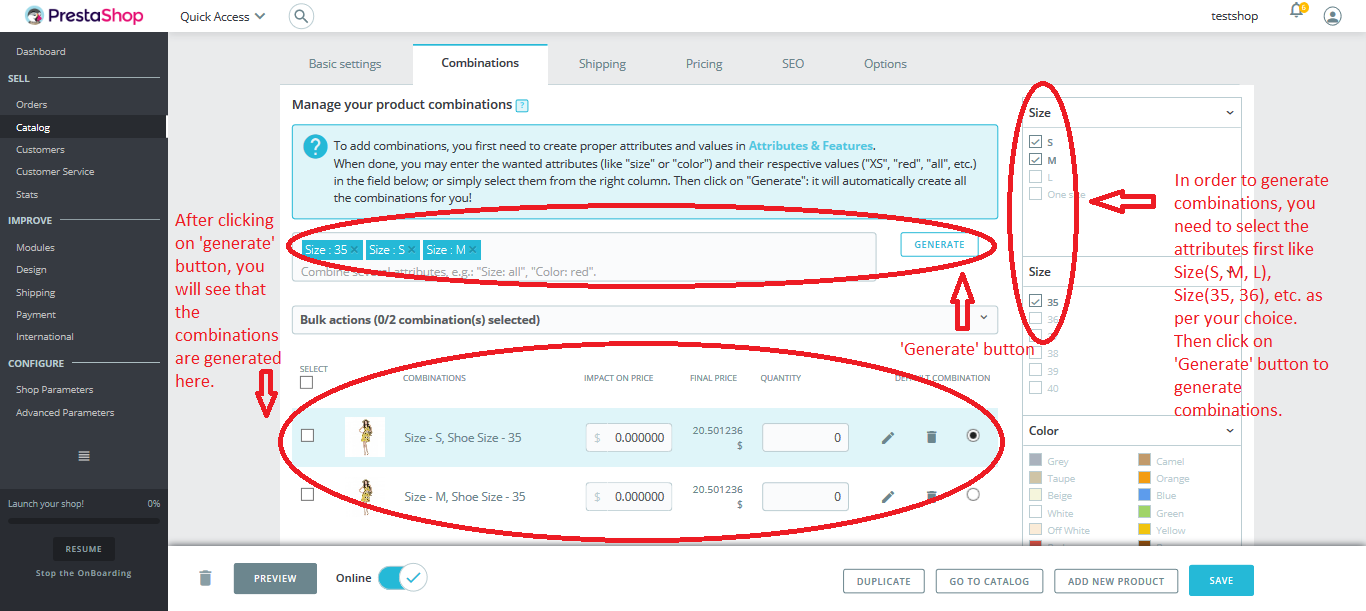
Now, if you choose ‘Product with combinations’ options rather than ‘Simple Products’ then you can see that a new tab will be added after ‘Basic Settings’ and you need to generate combinations for this product by clicking on this tab as given below in screenshot.
Now, again go to ‘Basic Settings’ tab.
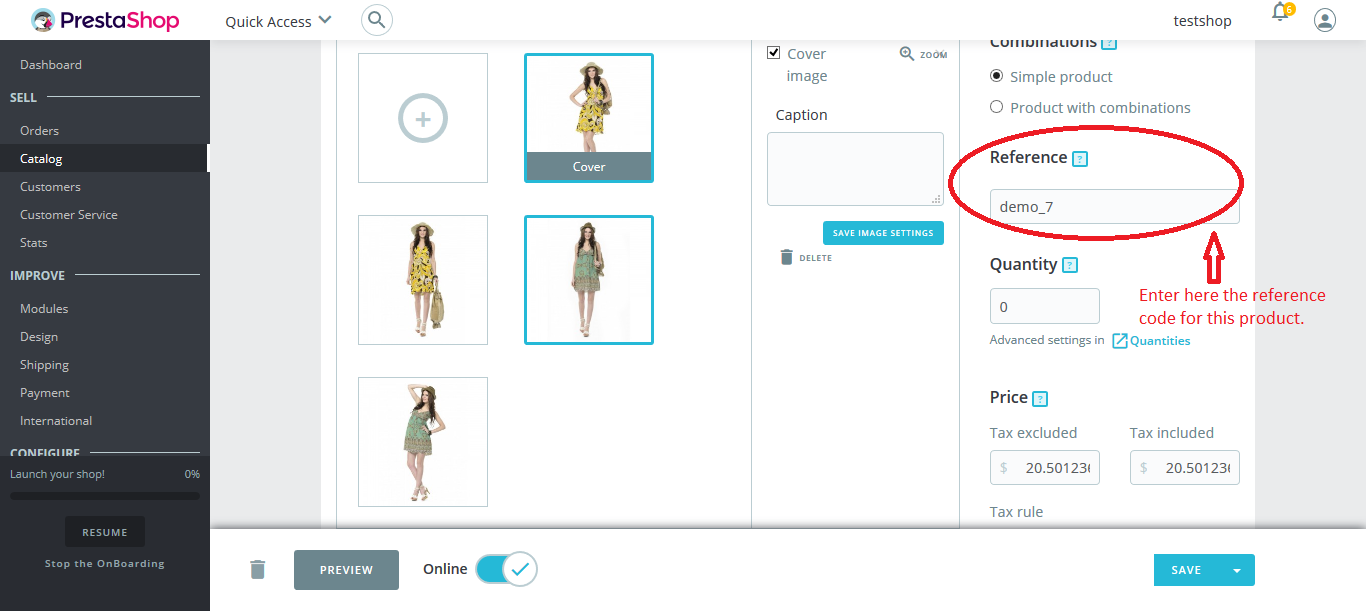
Reference: Enter reference code for this product here as given below in screenshot.
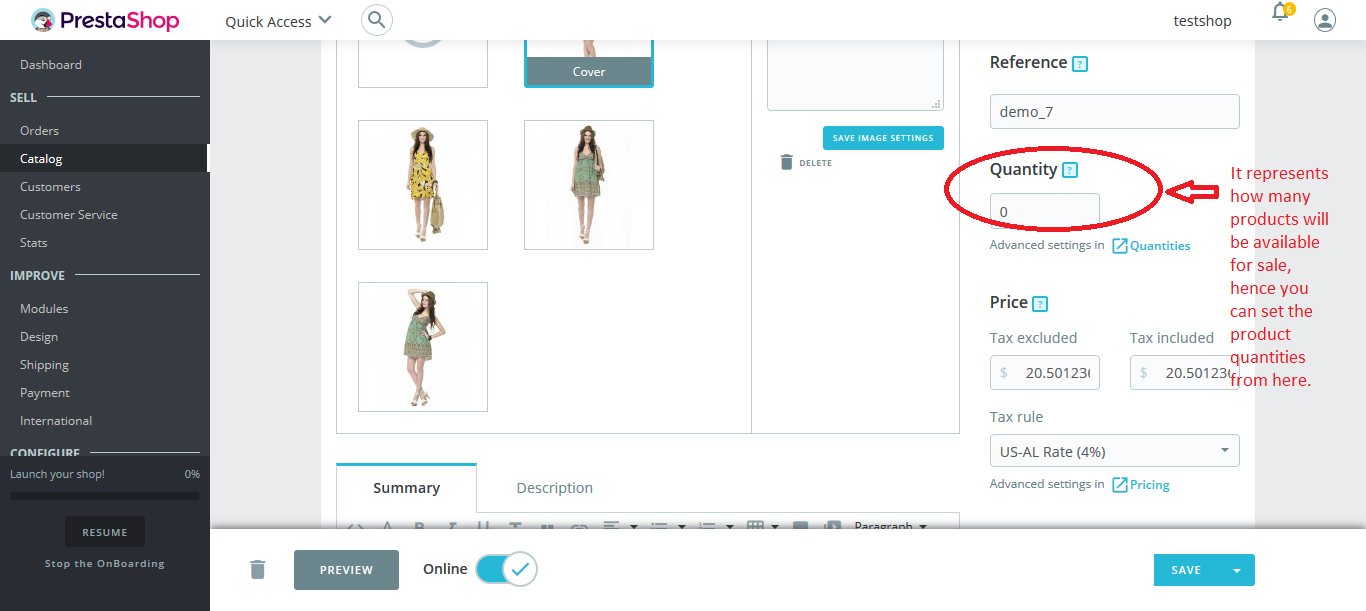
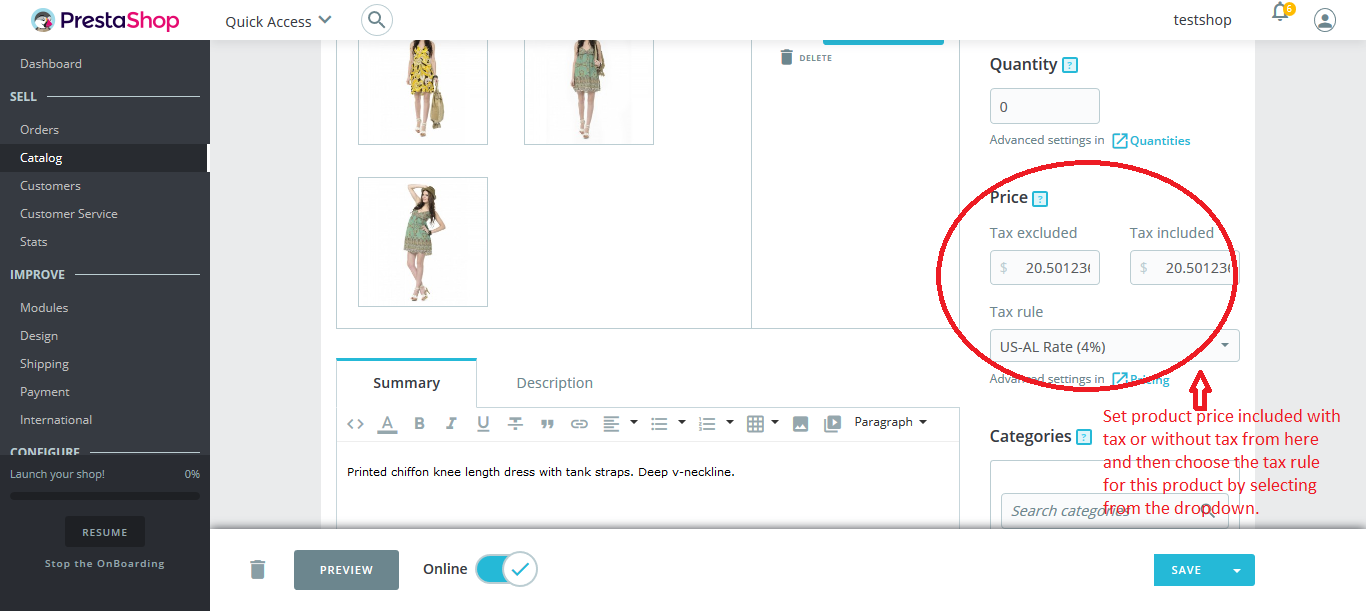
Quantity: Enter product quantity for sale as given in screenshot.
Price: Set price included with tax or without tax and then select price rule from the dropdown as given in screenshot.
Categories: Choose categories from here in which the product should lie. And the main category is where the product appears by default and you can see this in the product page’s URL as given in screenshot.
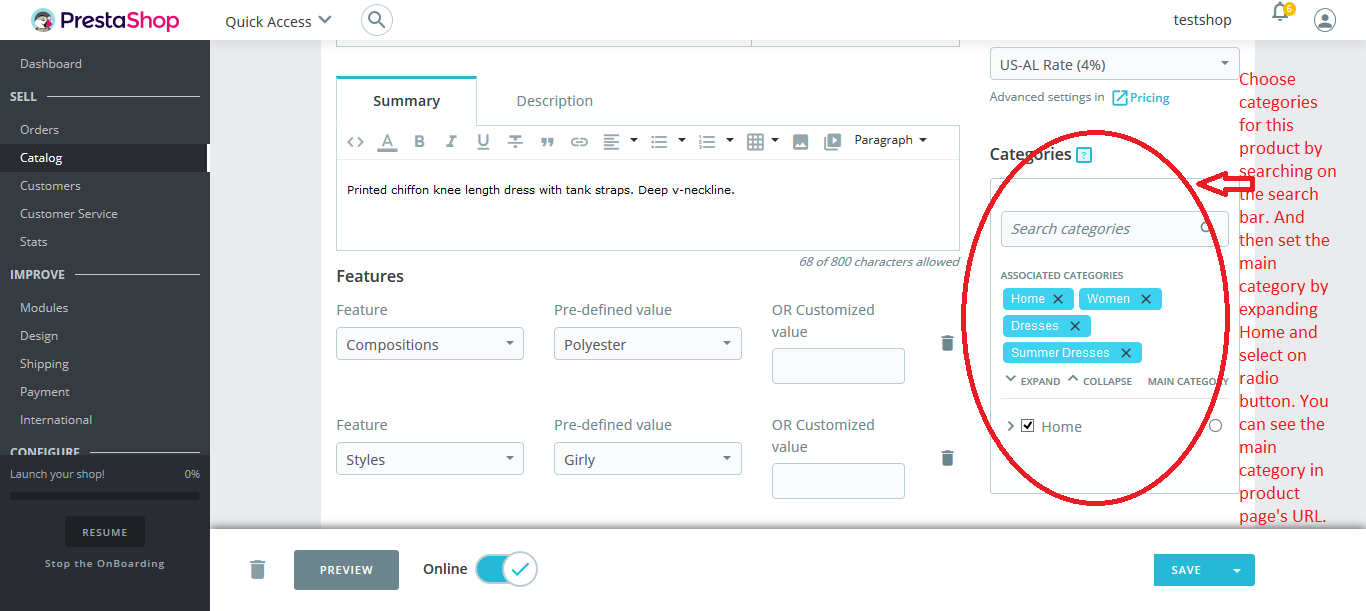
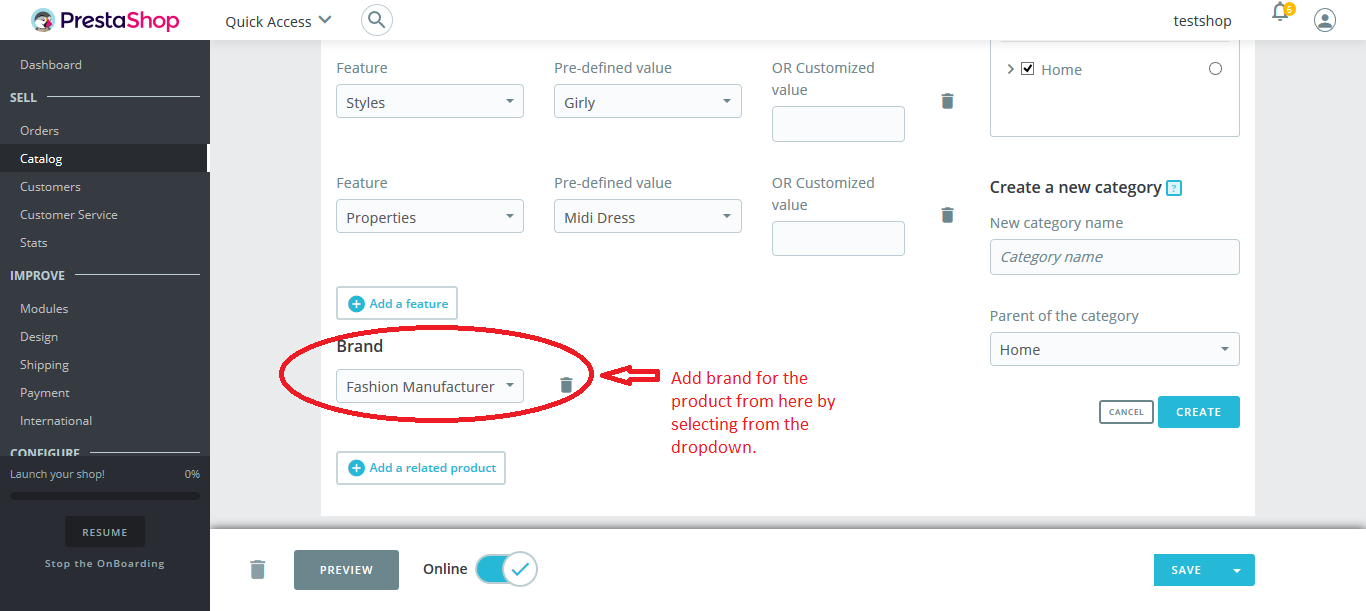
Create a New Category: If you want to create a new category, then you can do from here but you need to fill all the details in Categories page as given in screenshot.

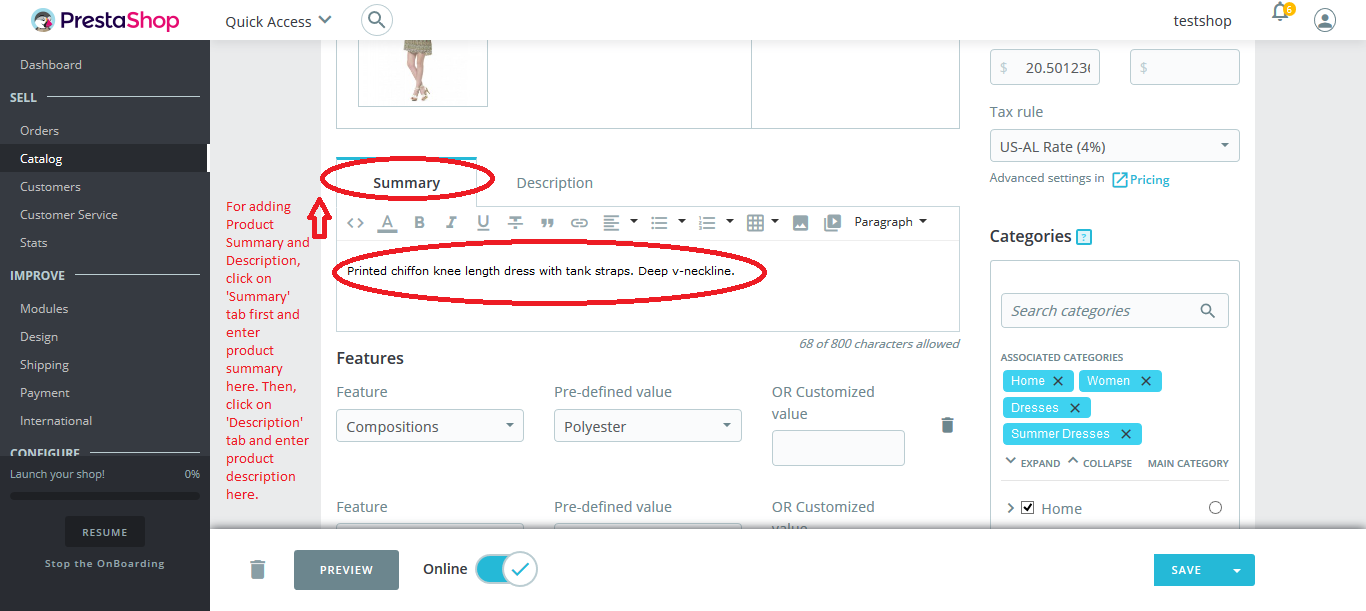
Summary & Description: For Summary, click on ‘Summary’ tab and add the summary here that you want to display for this product.
And for Description, click on ‘Description’ tab to enter the product description as given in screenshot.
Features: For Features, click on ‘Add a feature’ button to add features and then fill all the fields i.e; Feature, Pre-defined value OR Customized value as given in screenshot.

Brand: Select brand from the dropdown for this product as given in screenshot.
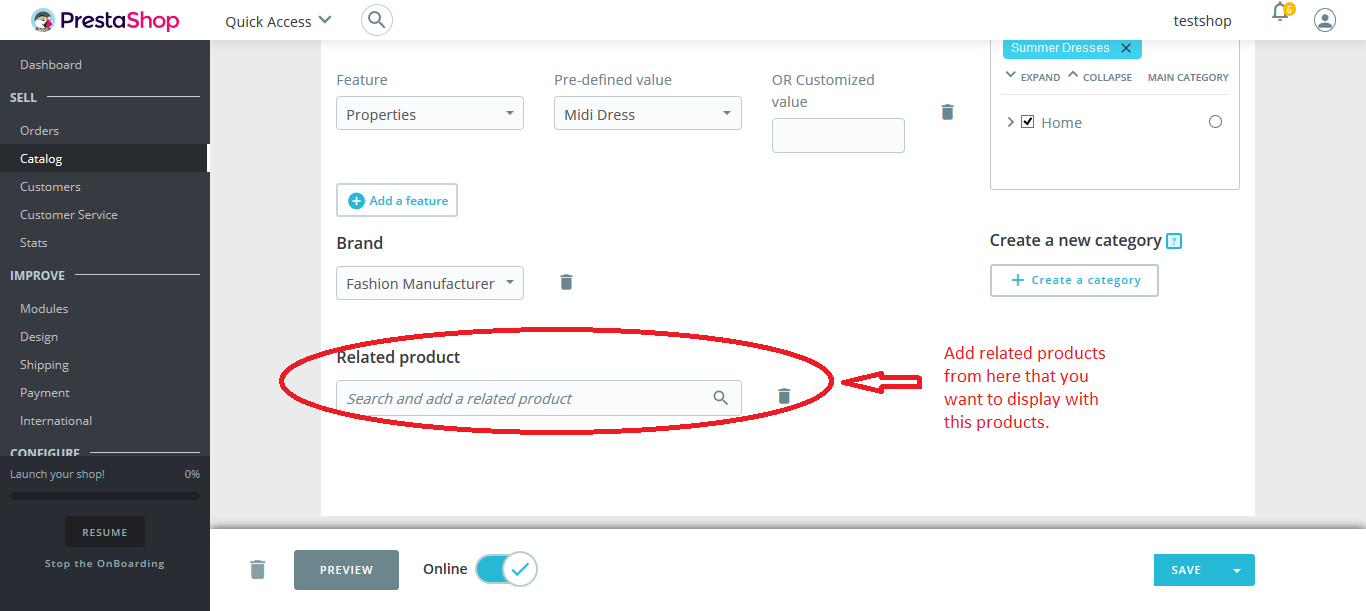
Related Product: Add related product from here that you want to be displayed with this product as given in screenshot.
Now, click on ‘Quantities’ tab.
Quantities:
For Quantities,
Quantities: Enter product quantity from here. And you can also set minimum quantity for sale where minimum quantity is the quantity required to buy this product.
If you want to disable this feature, then you need to set it as 1 as given below in screenshot.
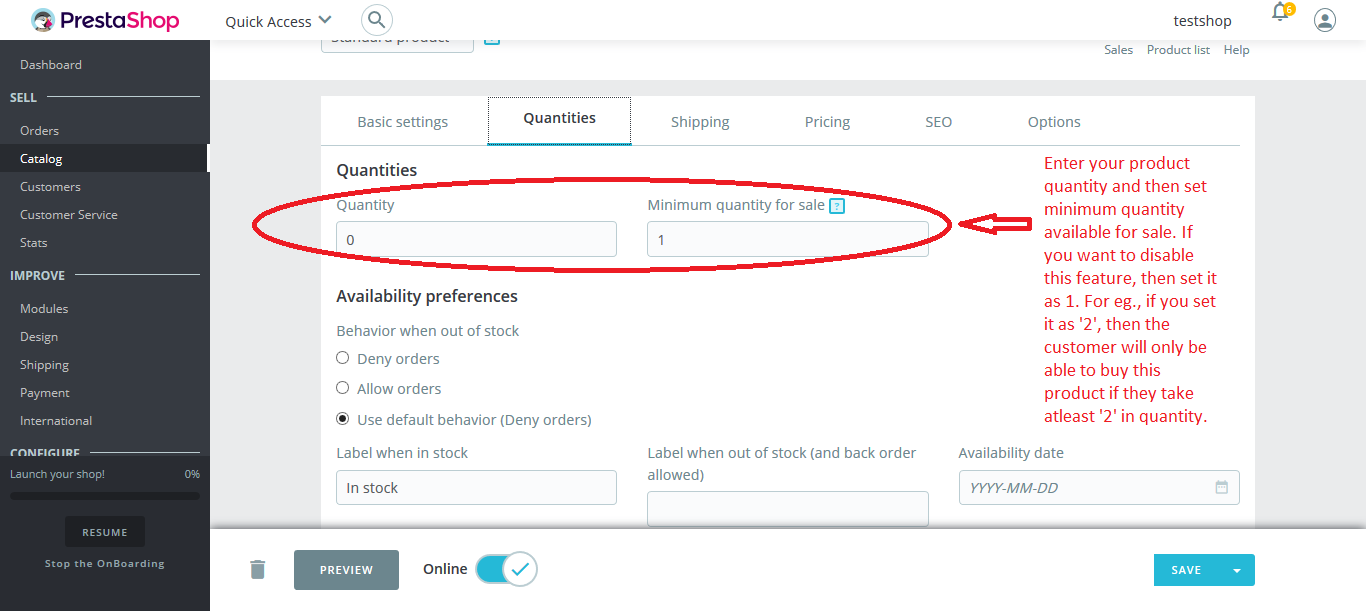
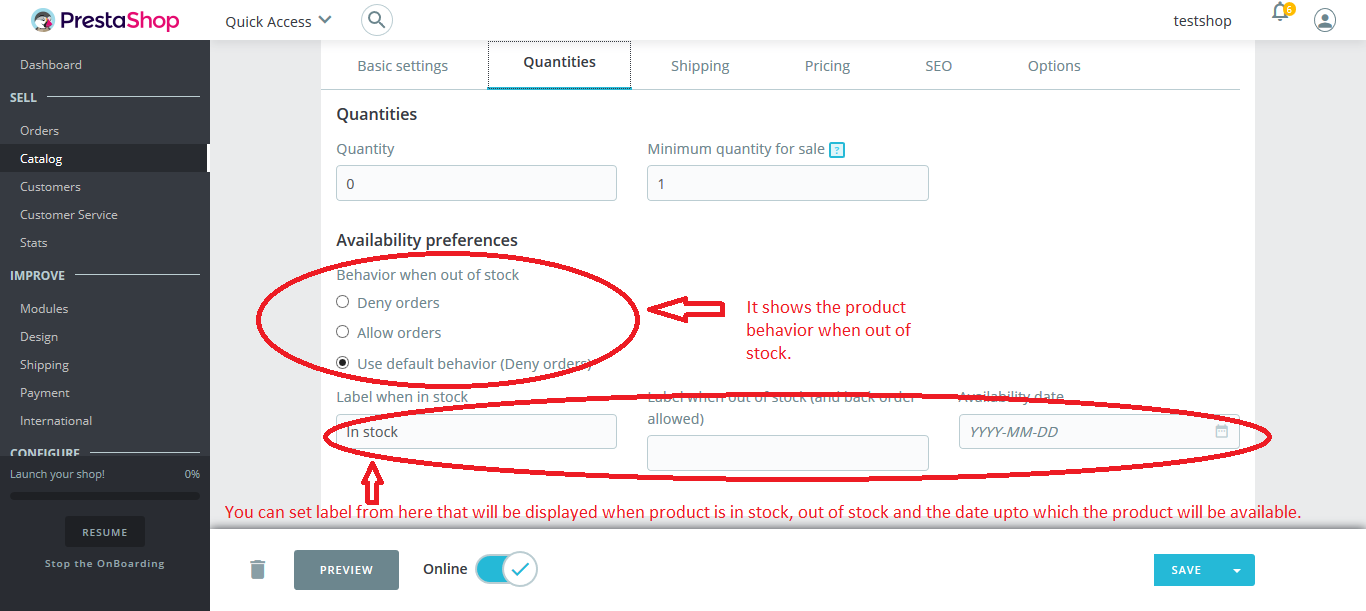
Availability Preferences: From here, you can set the behavior when product is out of stock. Now, choose the label that will be shown when product in stock and out of stock as given in screenshot.
Now, click on next tab, i.e; Shipping.
Shipping:
For Shipping,
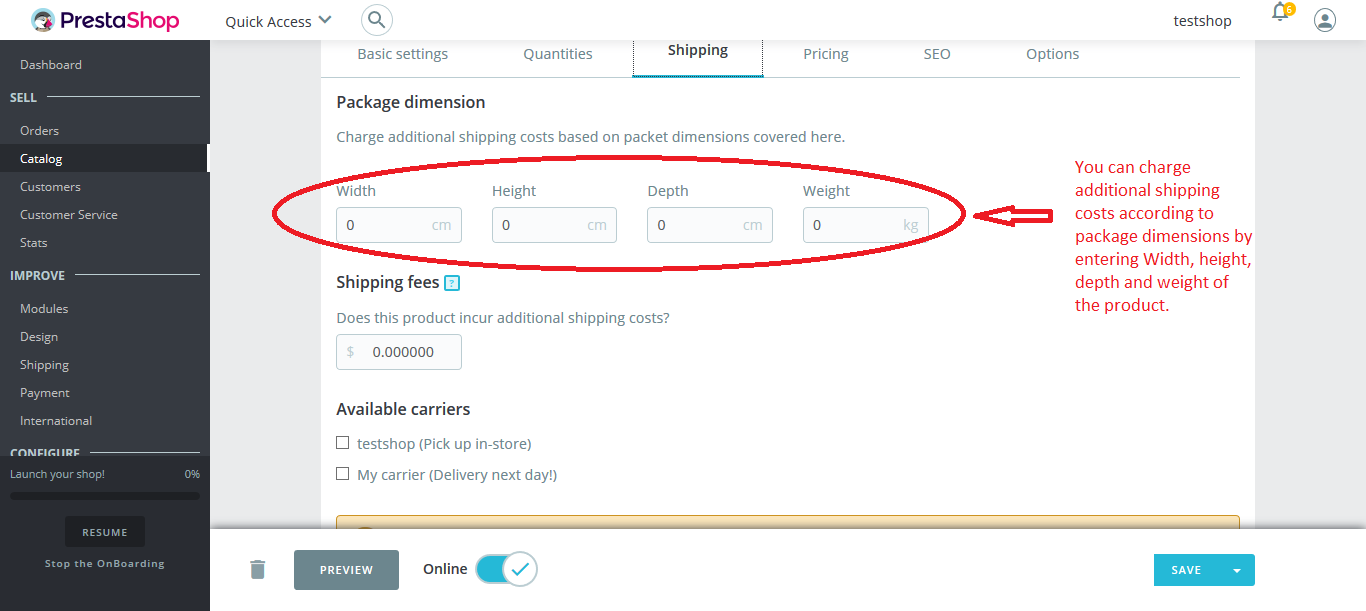
Package dimension: You can charge additional shipping cost according to the product dimensions by setting Width, Height, Depth and Weight as given in screenshot.
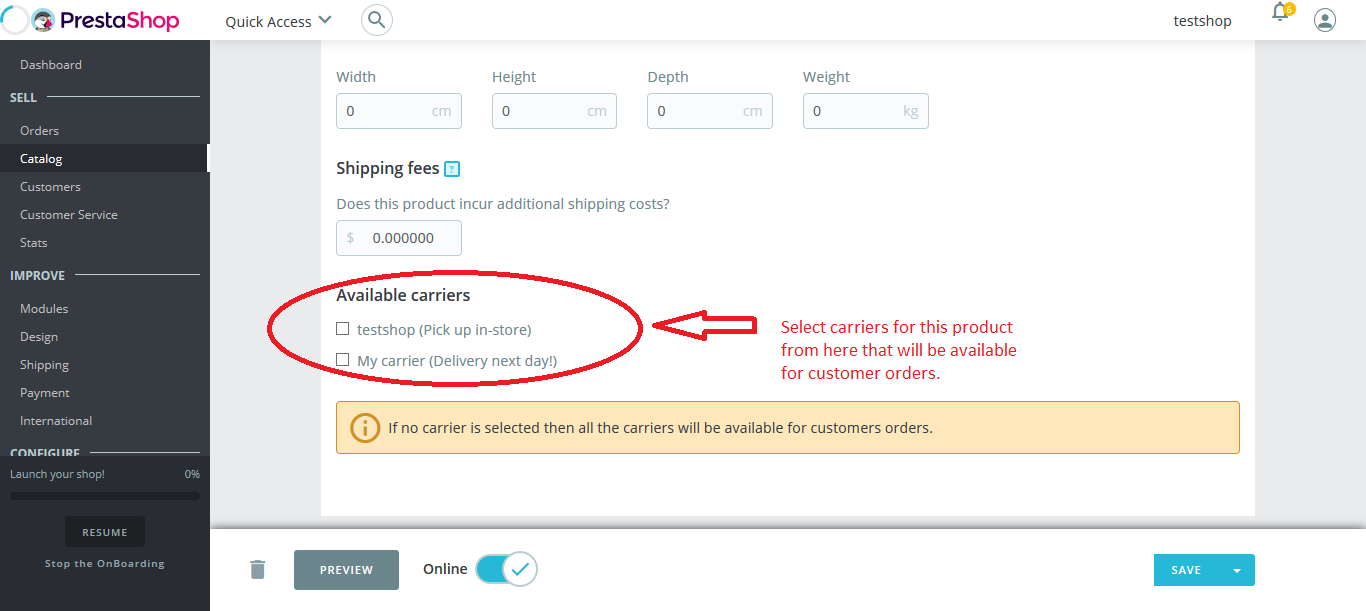
Shipping fees: For this, it will be added to the shipping fees if a carrier has a tax as given in screenshot.

Available carriers: Select the carrier for this product that will be available for customer order. If no carrier is selected, then all the carriers will be available for order as given in screenshot.
Now, click on next tab, i.e; Pricing.
Pricing:
For Pricing,
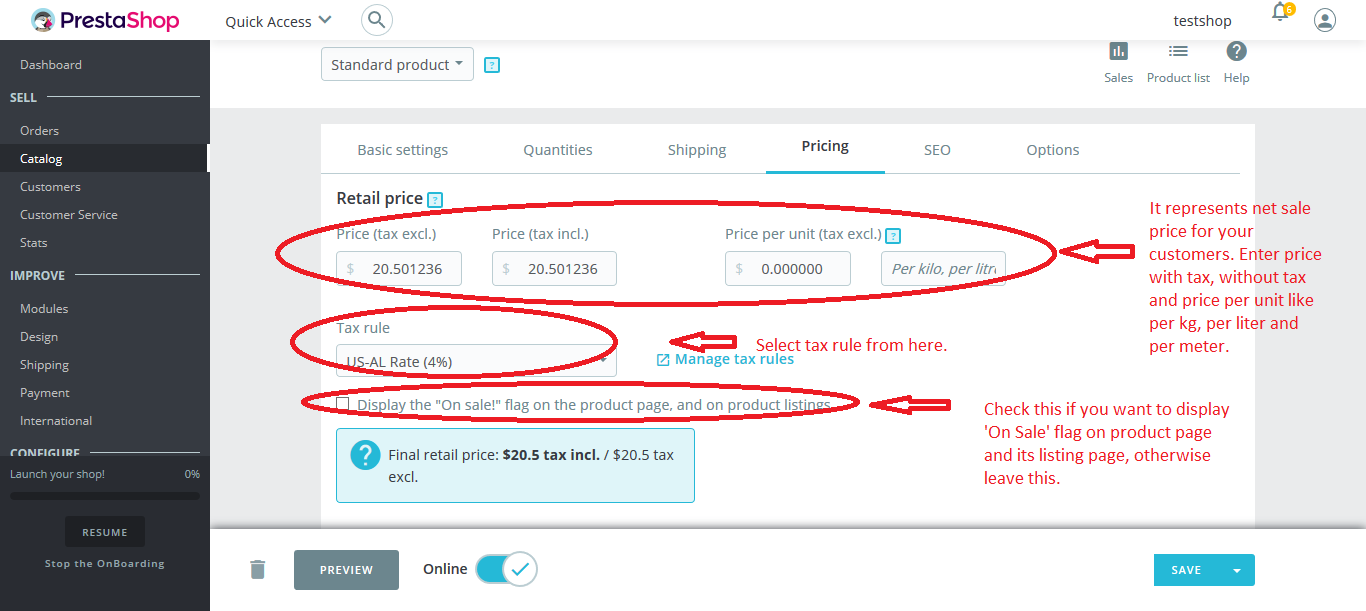
Retail price: It represents the net sale price for the product that will be automatically calculated using the applied tax rate. You can set price with tax and without tax. Another fields are for setting price per unit i.e; price per kg, price per liter and price per meter. Now, choose the price rule from the dropdown.
And then check the ‘On Sale’ flag checkbox to display ‘On Sale’ flag on product page and its listing page as mentioned in screenshot.
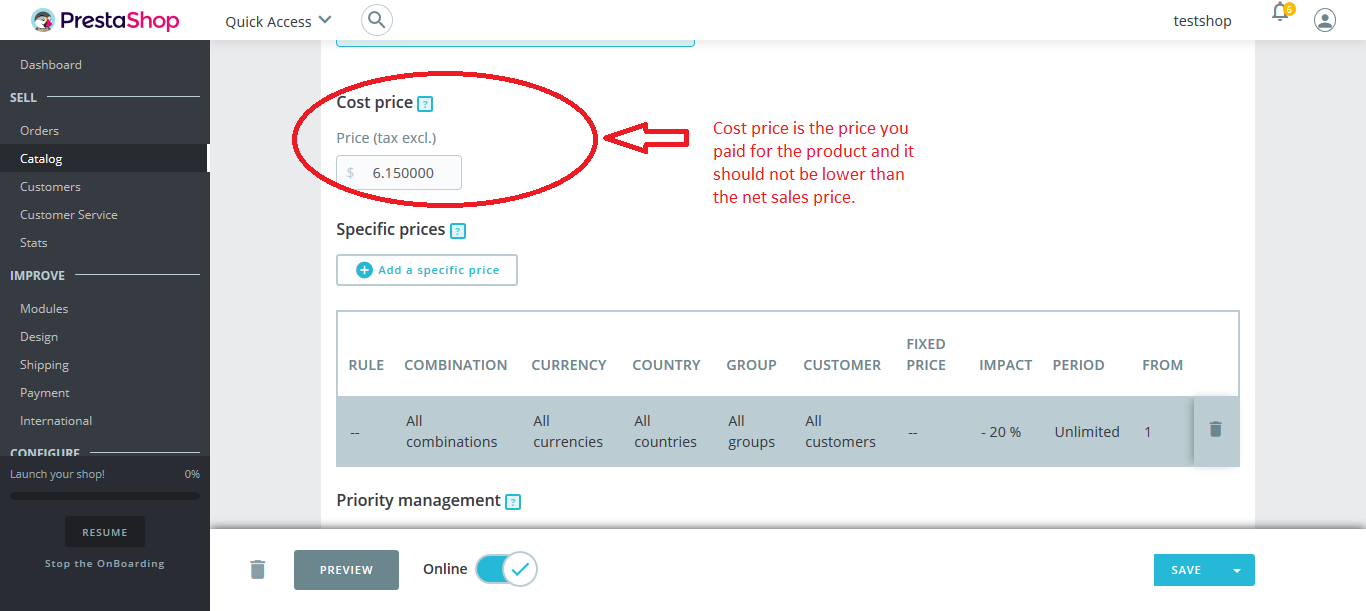
Cost price: It is the price that you paid for the product, it does not include tax and should be lower than the retail price as given in screenshot.
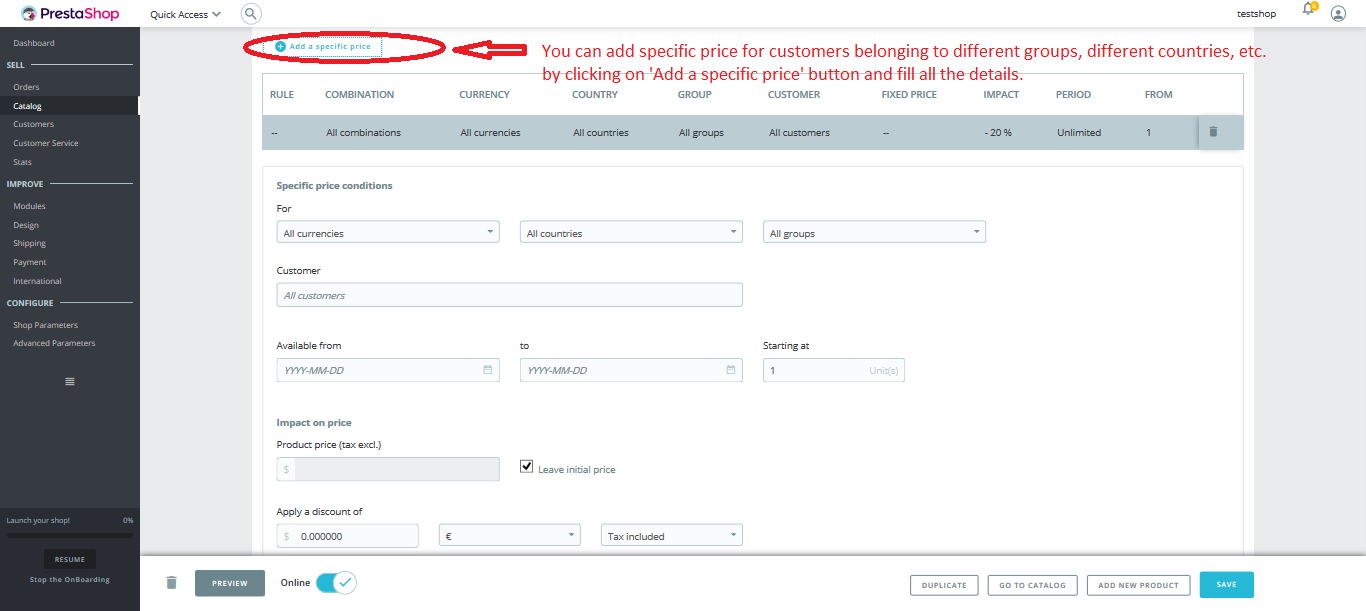
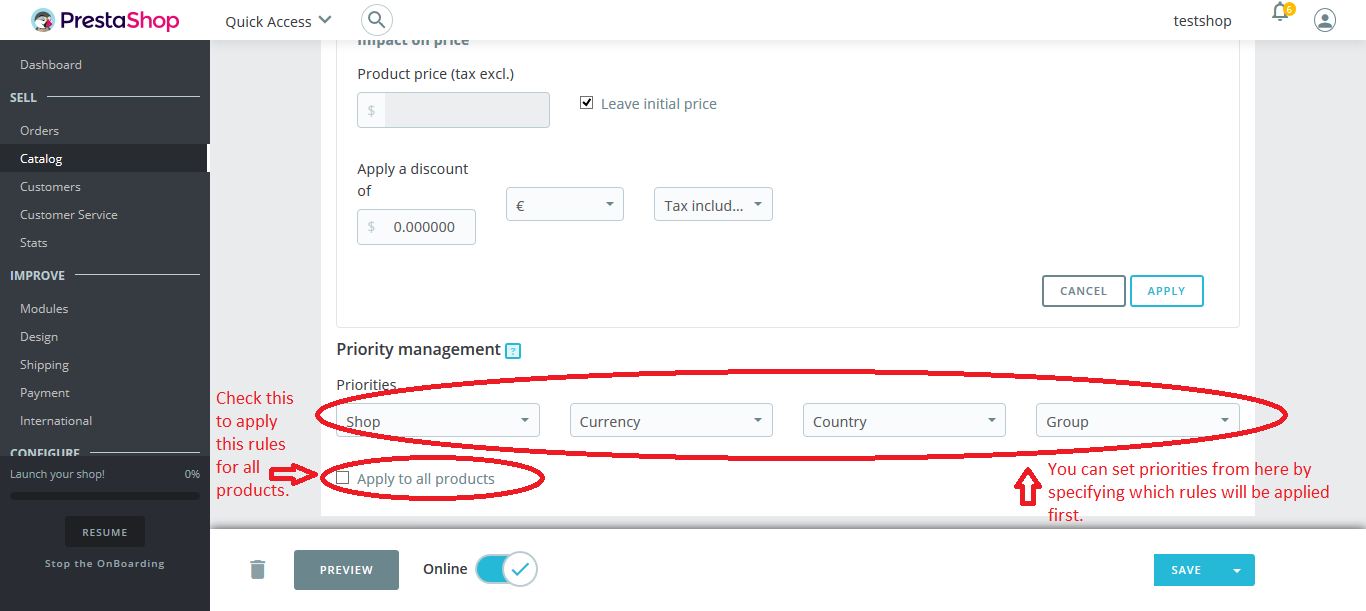
Specific prices: You can set specific price conditions for customers belonging to different countries, groups, etc. by clicking on ‘Add a specific price’ button.
Now, fill all the details in this like for, customer, available date, etc and then click on ‘Apply’ button as mentioned in screenshot.
Priority management: Priority management allows us to apply rules based on priority because there may be a situation when a customer fits into multiple price rules. Check apply on to apply this rule for all products as mentioned in screenshot.
Now, click on ‘SEO’ tab.
SEO:
Search Engine Optimization: In this, enter Meta title and Meta description for the product that will be appear in search engines. Now, enter friendly URL that is human-readable URL, generated from the product’s name.
You can also change this as per your requirements as given in screenshot.

Redirection page: This is for redirection of the customer to the particular page that you want customer to redirect if the product is disabled. Select page from this dropdown as given in screenshot.

Now, come to next tab, i.e; Options
Options:
For Options,
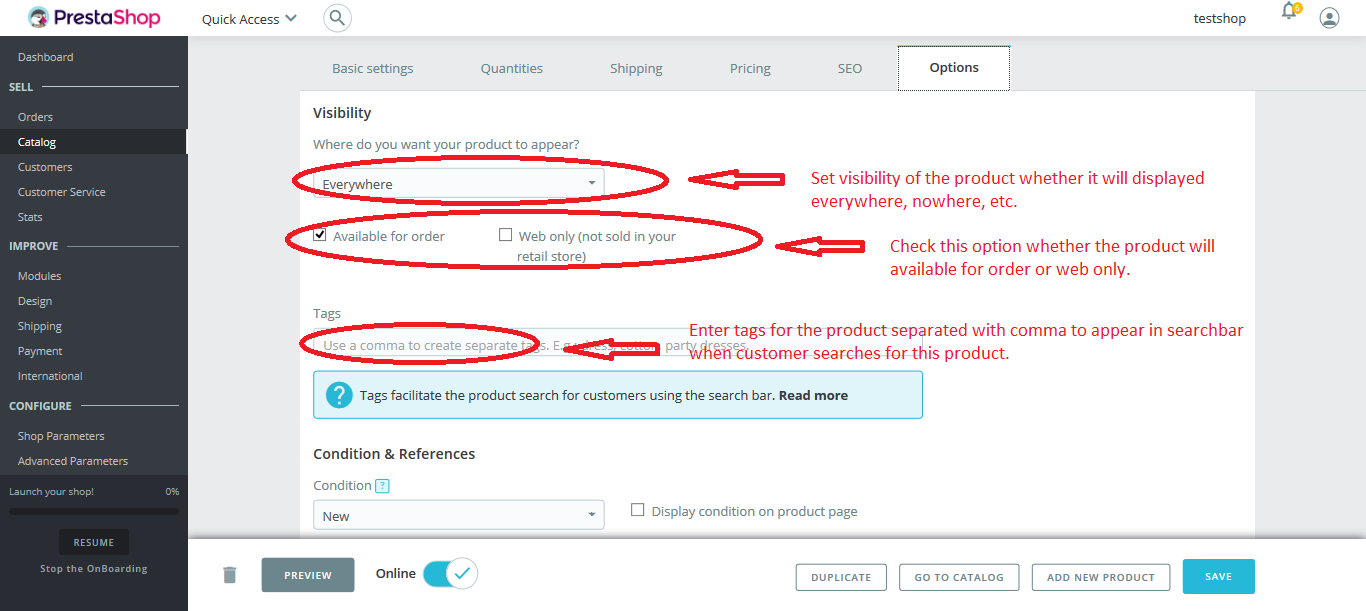
Visibility: Here, you can set the visibility of the products whether it will appear everywhere or on catalog only, or search only or nowhere. After that, you can set whether the products will available for order or for web only.
Now, enter the tags on the input box for this product. This tags will help customer in searching products using the search bar as given in screenshot.
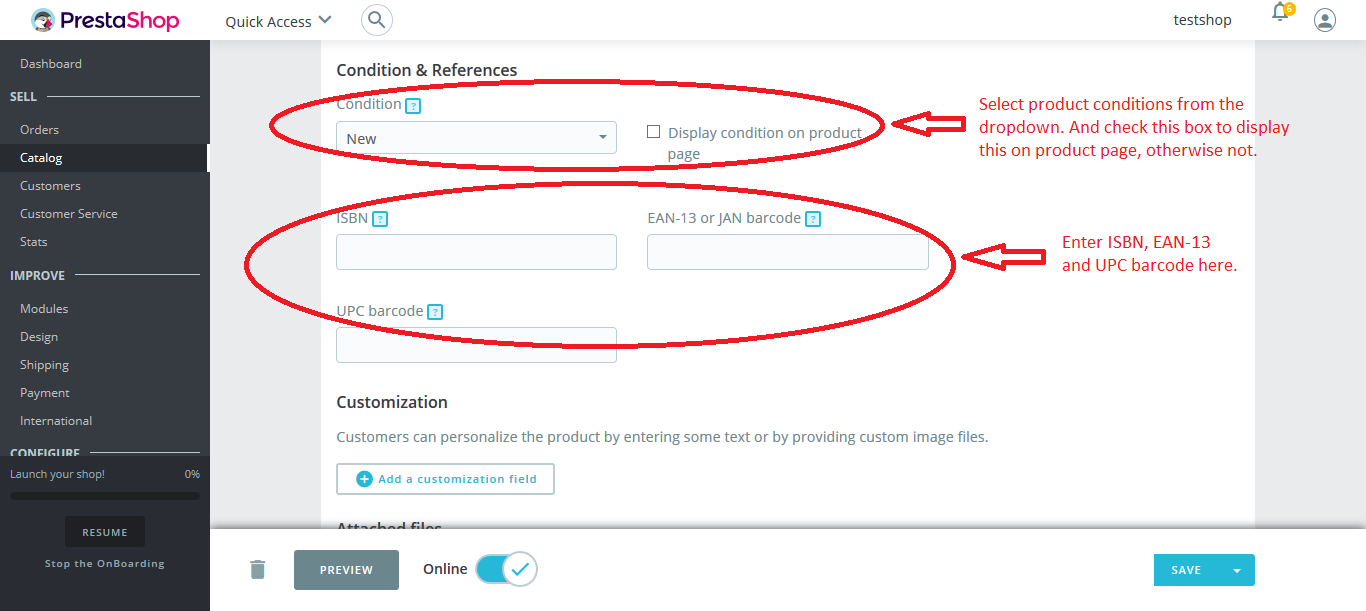
Condition & References: Here, you can specify the condition of the product whether it is new or used or furnished by selecting from the dropdown and then display this condition on product page by check the box.
Now, enter ISBN, EAN-13 or JAN barcode and UPC barcode in the input box as mentioned in screenshot.
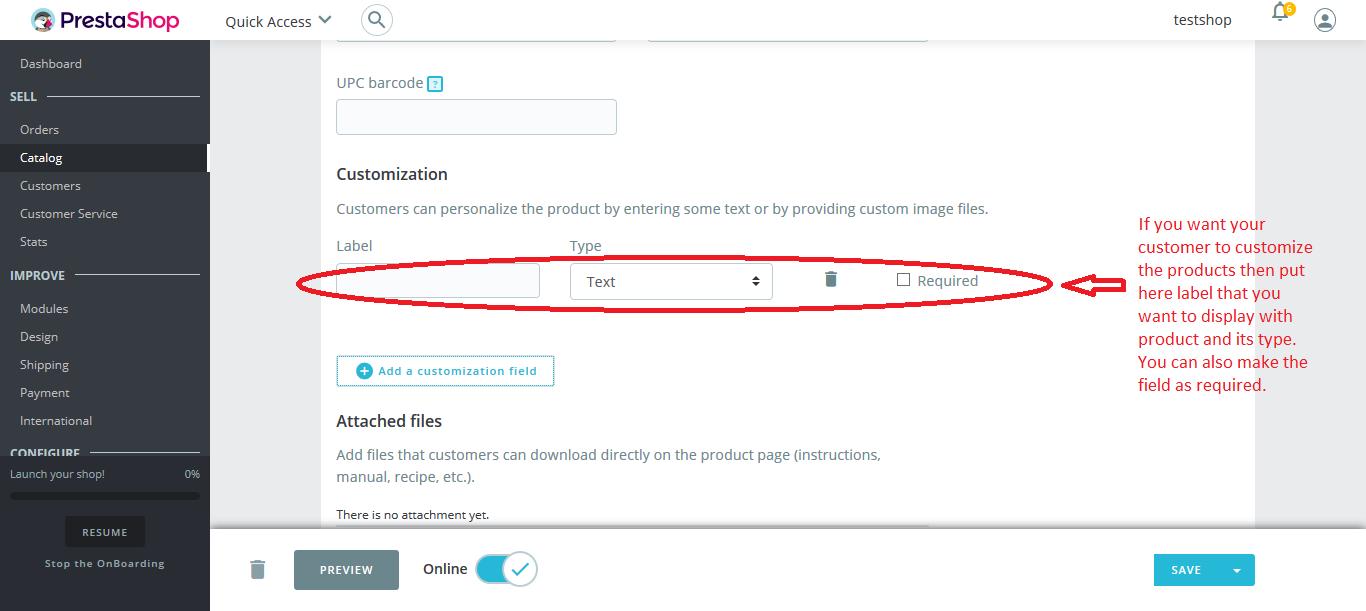
Customization: Customization is for customizing product by the customers by entering any text or providing any custom image files as mentioned in screenshot.
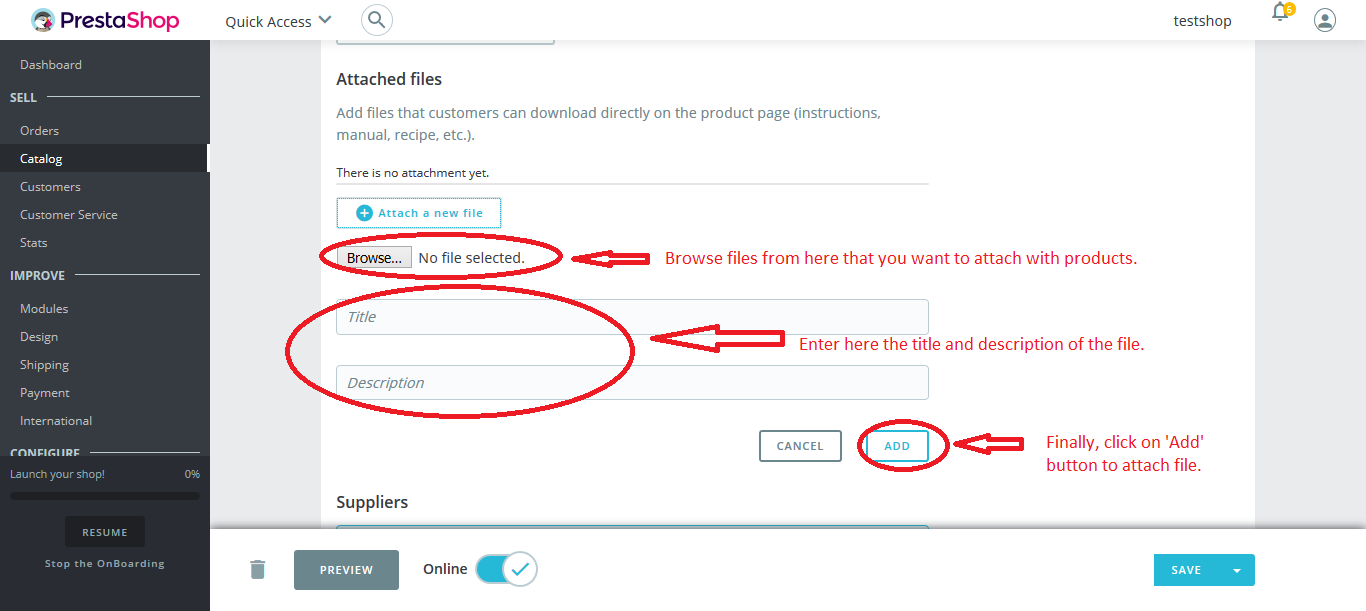
Attached files: You can attach any files with the product like instructions, manual, etc. by clicking on the ‘Attach a new file’ button so that the customers can download directly from the product page as mentioned in screenshot.
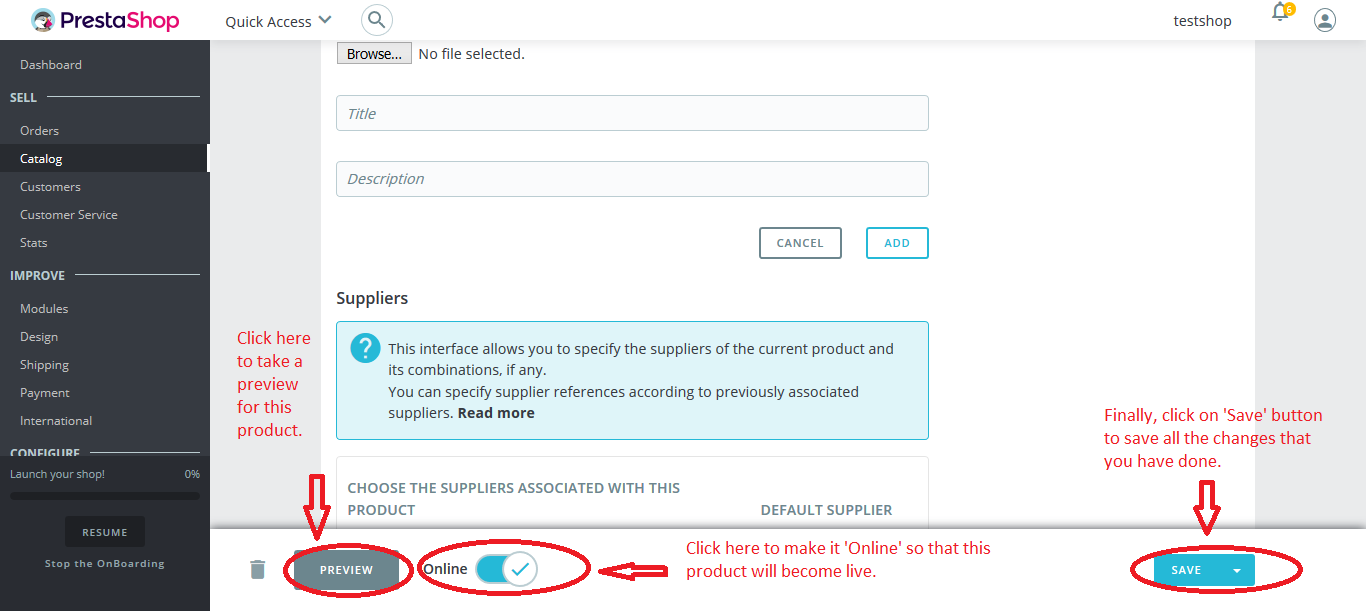
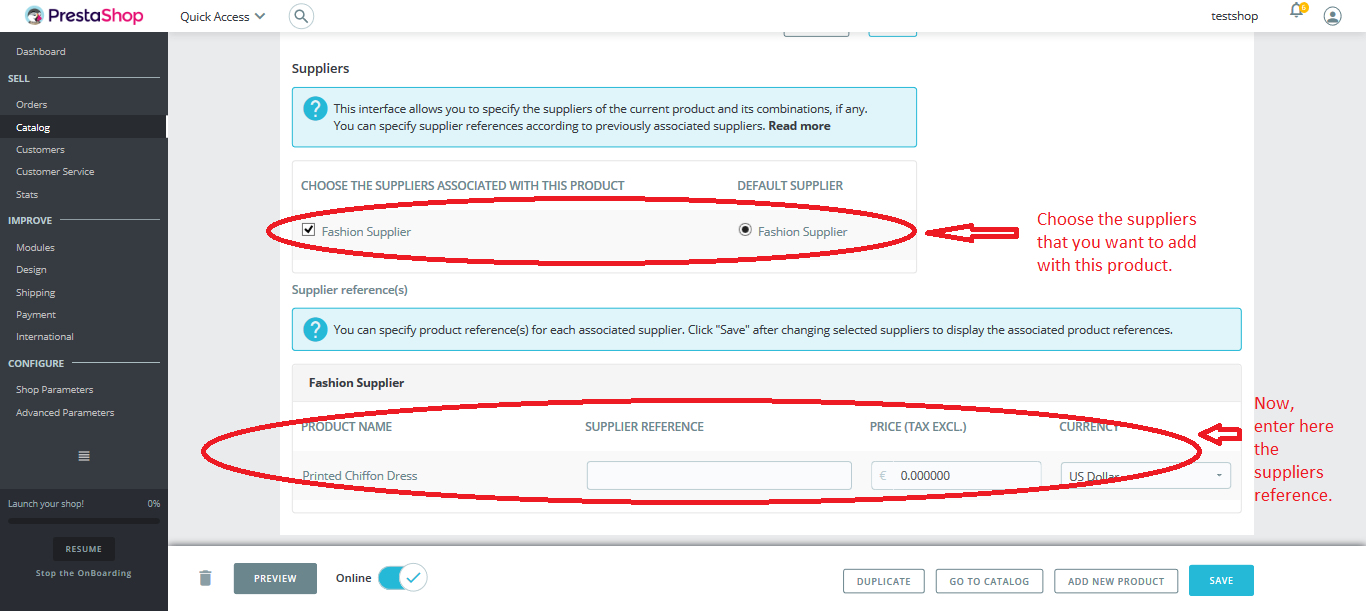
Suppliers: It specifies the suppliers of the current product and its combinations, if any. You can choose the suppliers for this product from here. And then enter the Supplier reference(s) as mentioned in screenshot.
Step4:
Finally, click on ‘Save’ button to save all the changes that you have done for this product as mentioned in screenshot.